H1SAB Hybrid Fiber Coax Cable Prep Guide

Products Used in This Guide
H1SAB Hybrid Fiber / Coax Cable
H1SAB is the fiber leg of PCT’s hybrid fiber coax cable with a 900 µm tight buffered, bend insensitive, single mode fiber. This user guide will demonstrate the recommended preparation of the fiber optic cable.
Tools featured in this guide are the Ripley® Miller® (www.ripley-tools.com):
1. 400 Series Slitter Tool (part no. 80964)
2. Strip n’ Cut Tool (part no. 81430)
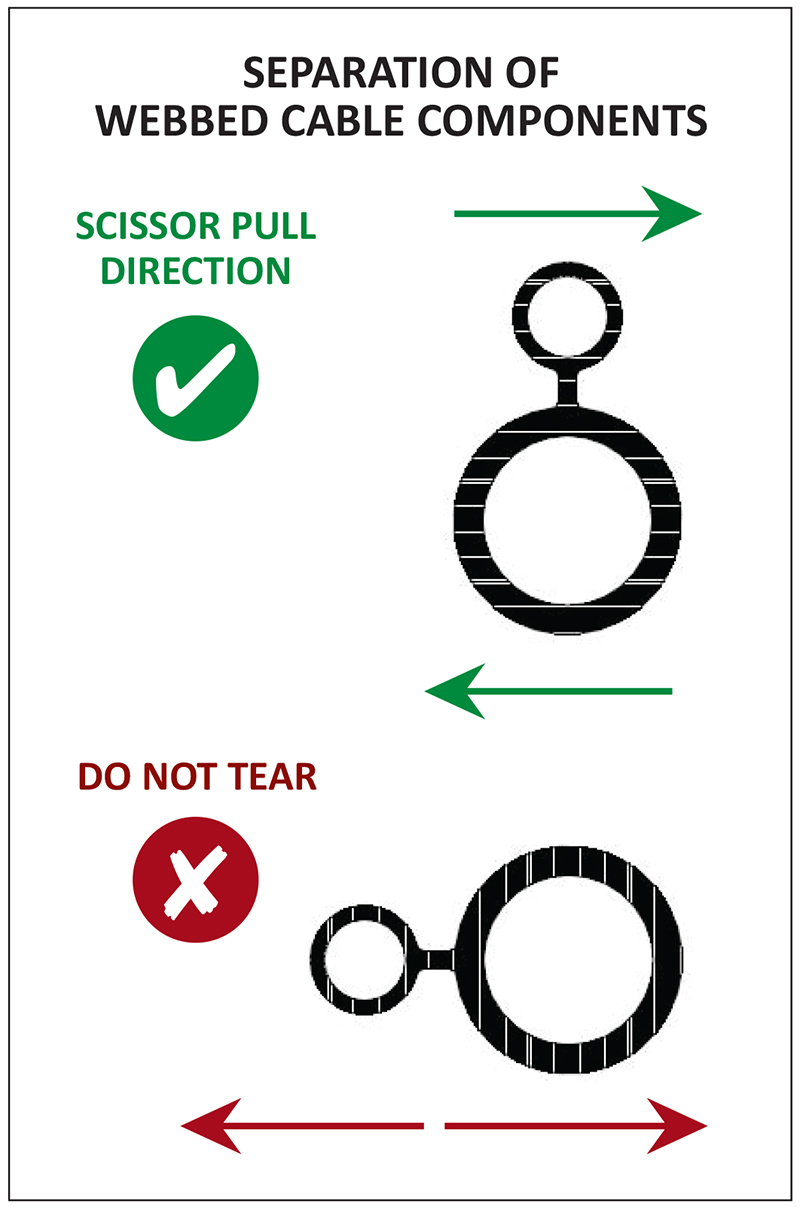
SEPARATE FIBER FROM COAX
The fiber optic cable must first be separated from the coax.
1. Snip the web between the fiber and the coax then separate the fiber leg from the coax using a steady pull in a scissor direction as shown in the figure below.

REMOVE OUTER SHEATH
H1SAB contains a 2.0 mm simplex fiber cable as shown in the diagram on the right. To access this cable, the outer sheath must be removed.

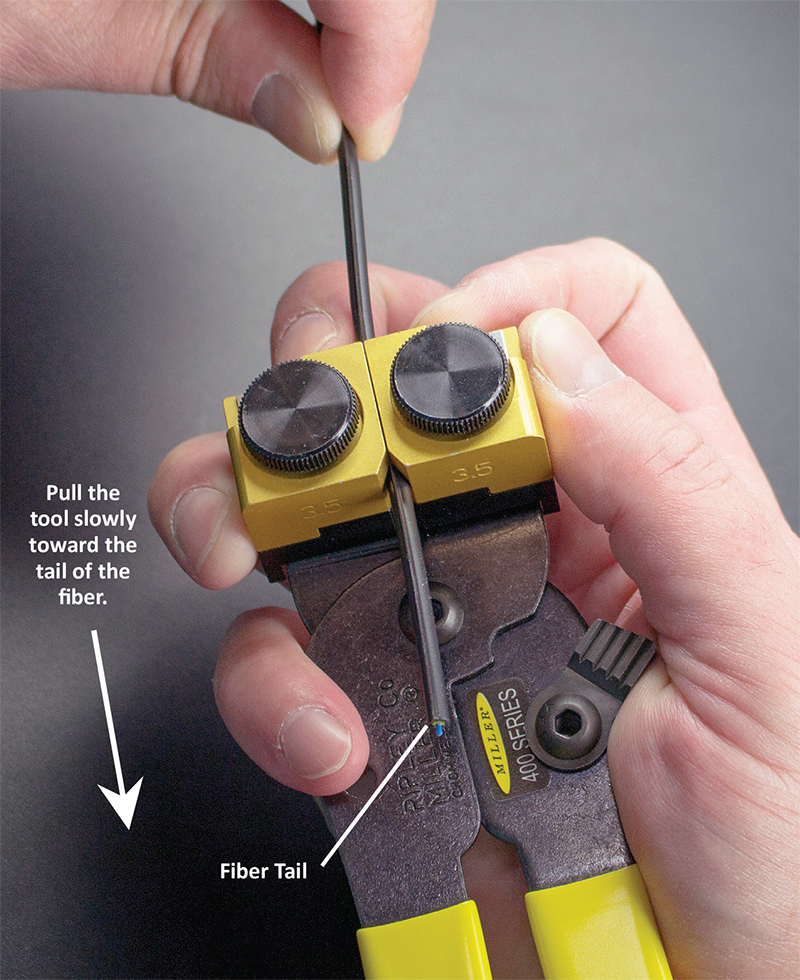
Use a cable slitter tool to remove the outer sheath of the cable. The tool has two (2) opposing blades to simultaneously slit the sheath into two (2) halves. (See photo to the right demonstrating use of the cable slitter tool.)
1. Place the fiber optic cable into the cable slitter tool, orienting the web rib so it faces the top of the tool with the tail toward the handle as shown.
2. Grasp the tool in one hand by placing the thumb and ring finger on the sides of the blocks. Place the index and middle finger on the back of the blocks.
3. With the other hand, grasp the cable behind the tool.
4. While applying a light amount of pressure on the blocks of the slitter tool with the fingers, begin pulling the tool slowly toward the end of the cable.
NOTE: Be careful not to apply too much pressure or the cable sheath may stretch instead of slitting and may result in damage to the fiber.
5. Confirm the fiber optic cable’s sheath is completely slit.
REMOVE PVC OUTER SHEATH
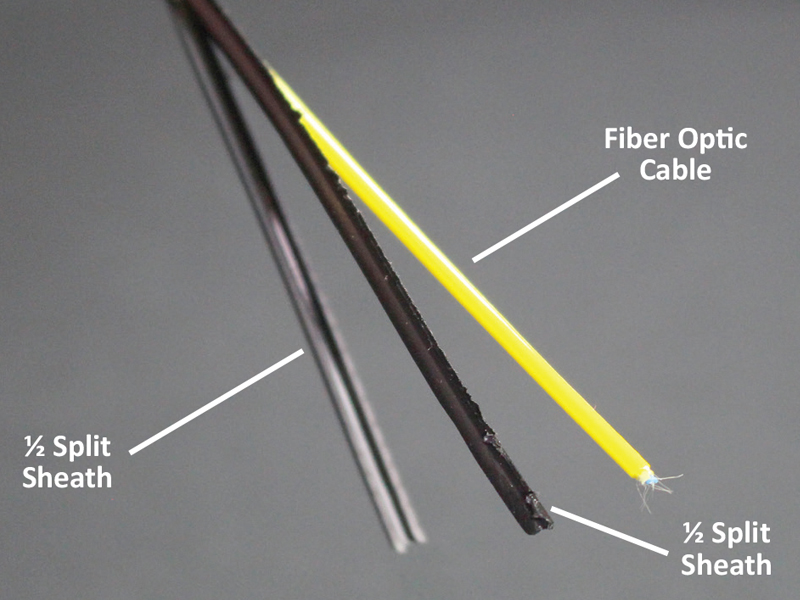
1. Carefully separate the two (2) halves of the sheath from the fiber optic cable.
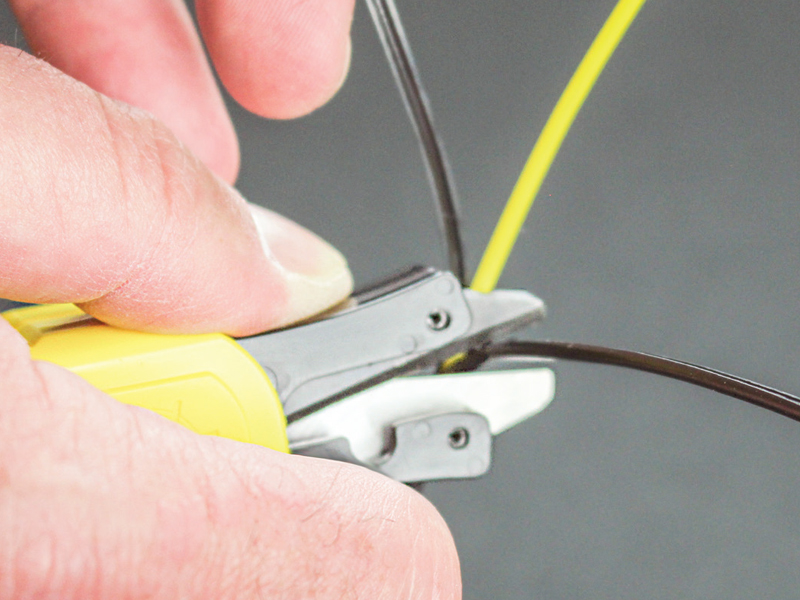
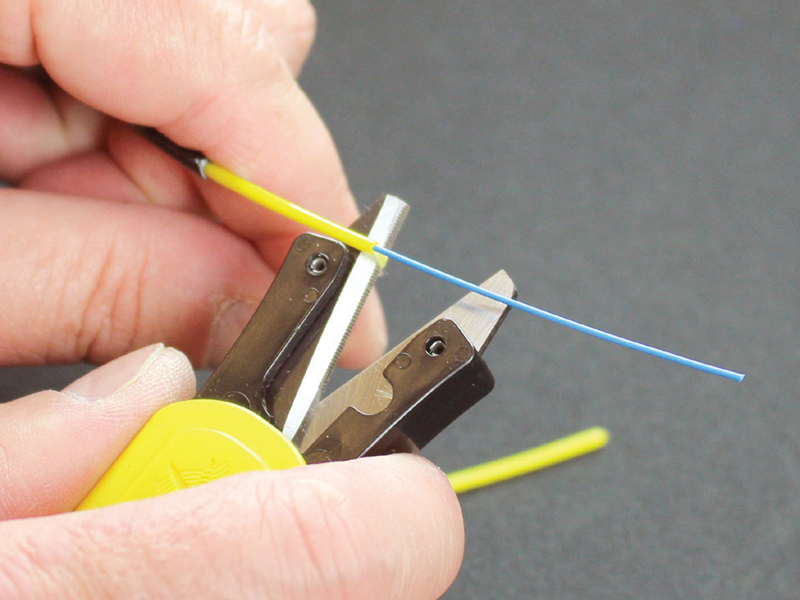
2. Using the cutting side of the Strip n’ Cut tool, cut away the two (2) sheath halves. Avoid damaging the cable.

3. Measure the length of the buffer tube to be removed and mark it.
4. Using the largest notch on the stripper side of the Strip n’ Cut tool, strip away the buffer tube.
TRIM ARAMID YARNS
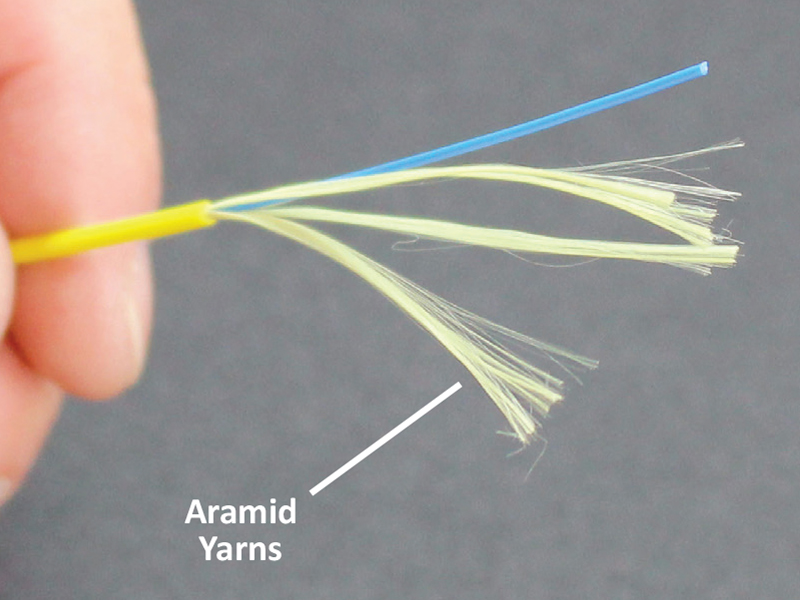
1. Observe the aramid yarns.
2. Using the cutting side of the Strip n’ Cut tool, trim away the aramid yarns.
STRIP AWAY COATING
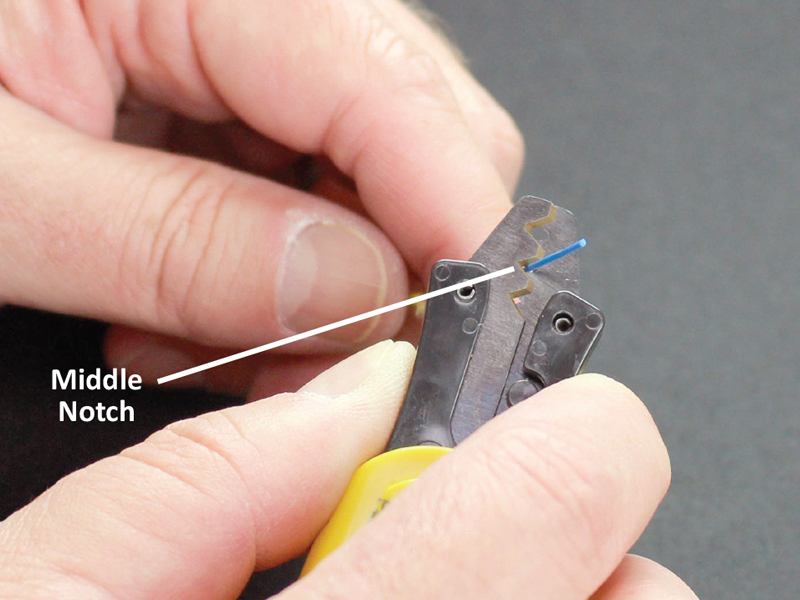
1. Using the middle notch on the stripper side of the Strip n’ Cut tool, strip off the 900 µm PVC coating and expose the length of 250 µm fiber.
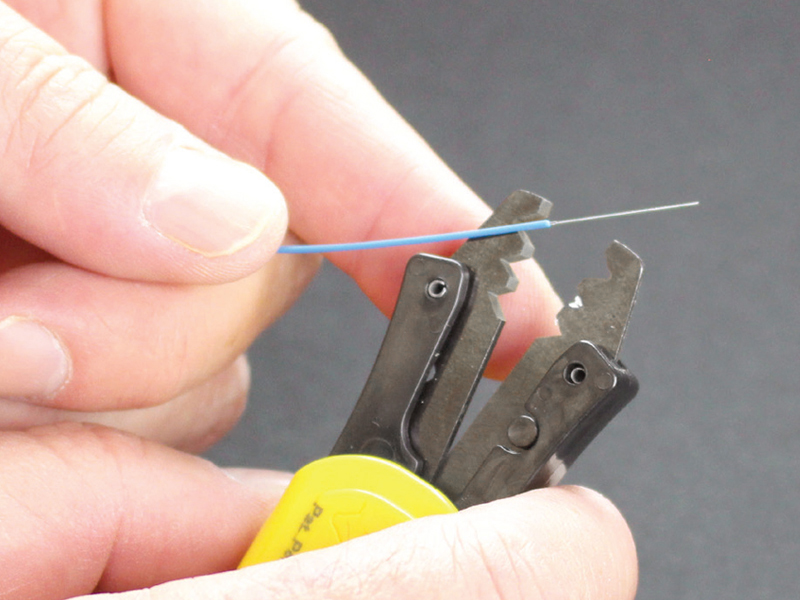
2. The 250 µm fiber is now ready to be stripped and prepared for splicing or connectorization.
