PCT-AIO-CT Connector Compression Tool
Instruction Guide
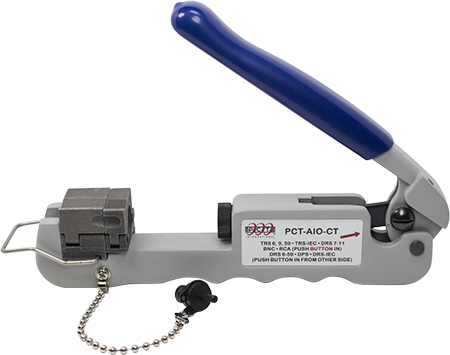
PCT-AIO-CT Connector Compression Tool
Works on most all F type
compression connectors:
BNC Series 6 & 59
DRS Series 6, 7, 11 & 59
DPS Series
ERS Series 6
FRS Series 6, 11 & 59
IEC Series
QP Series 6, 11 & 59
RCA Series 6 & 59
RA Series
TRS Series 6, 9, 11 & 59
Products Used in This Guide
PCT-AIO-CT Connector Compression Tool
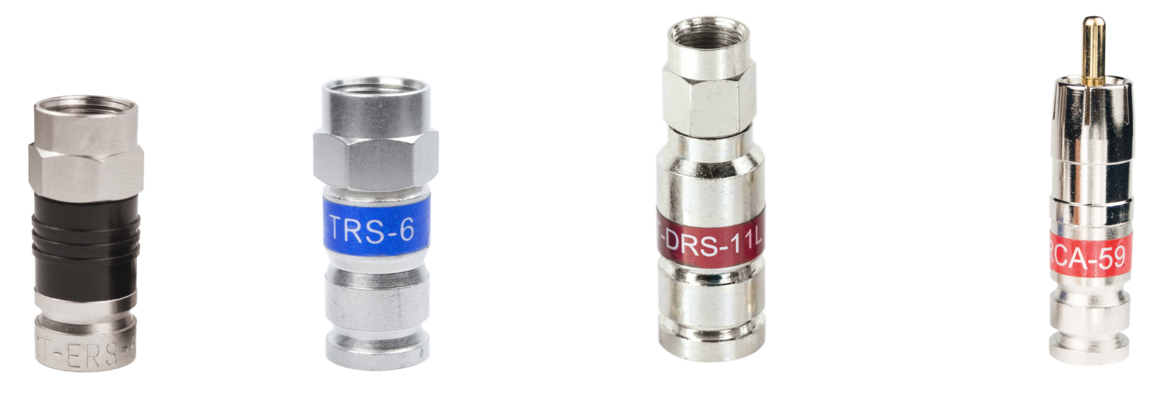
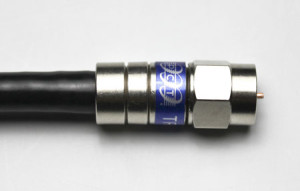
PCT-ERS-6, PCT-TRS-6, PCT-DRS-11L & PCTRCA-59 Connectors
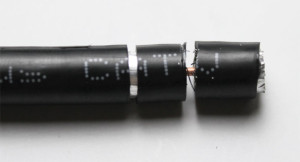
Preparing the Coaxial Cable
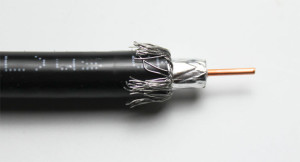
1. Prepare coaxial cable with a standard approved 1/4” x 5/16” cable prep tool.
2. Remove trimmed jacket and core plug from cable.

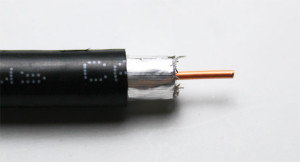
3. For tri-shield cable: Remove the outer layer of foil.
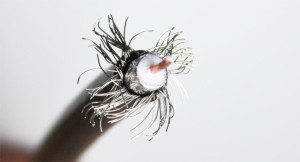
For quad cable: Fold back the first layer of braid wire, remove the outer layer of foil tape and fold back the second layer of braid.
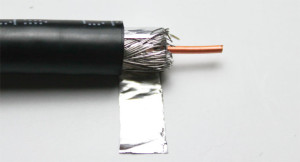
4. To reduce cable insertion force: Evenly flare and separate the braid.


Installing Connectors on to the Prepped Cable
1. Push the connector straight on so that the cable dielectric is properly aligned inside the connector mandrel.
Cable dielectric should be flush with the bottom of the nut.
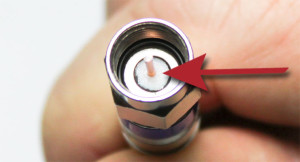
2. A slight twist in one direction can be used to ease the cable insertion. However, avoid excessive twisting.
Tips for Difficult Installations
1. Verify the coax cable meets SCTE maximum diameter specifications.
2. The compression tool can be used to add leverage when pushing the connector onto cable.

3. Make sure the handle button is locked closed to provide an even surface.
4. For cable that’s hard to insert, be sure to evenly spread and flare the braid.
5. Push the connector straight onto the cable. Do not twist the connector as this can make installation more difficult.
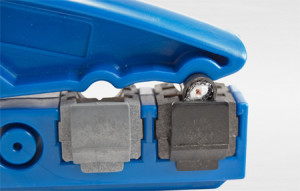
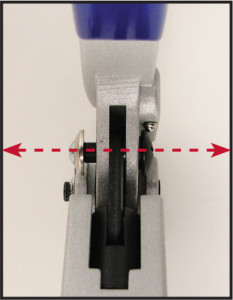
Using The Compression Tool
- Open the handle as shown above
COMPRESSING THE CONNECTOR
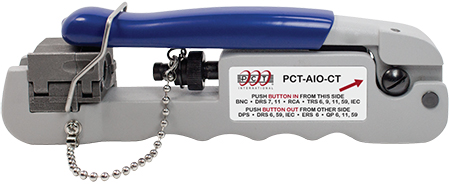
A. SET THE BUTTON ACCORDING TO CONNECTOR TYPE
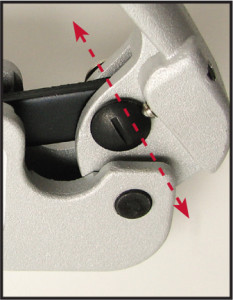
Push button towards back or towards front
for selection between compression lengths.
Push button IN from front
BNC, DRS7, 11; RCA; TRS 6, 9, 11, 59, IEC
Push button OUT from back
DPS; DRS 6, 59, IEC; ERS 6 ; QP 6, 11, 59
B. FOR RG-6, RG-59 F TYPE CONNECTORS
The following steps demonstrate compressing a PCT-ERS-6 compression connector onto RG6 coaxial cable.
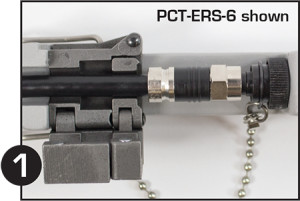
1. Insert mandrel into plunger as shown, lift top gate and insert connector.
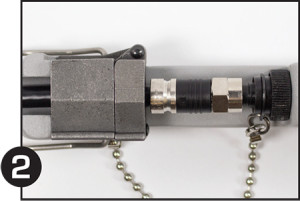
2. Close top gate.
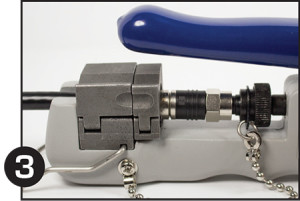
3. Close handle completely to compress.
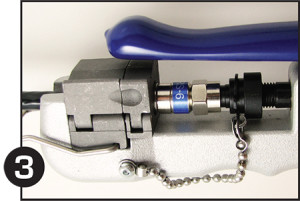
This ensures the connector sleeve is fully compressed onto the cable.
4. Remove the connector assembly from the tool and jumper assembly is completed.
The following steps demonstrate compressing a PCT-TRS-6 compression connector onto RG6 coaxial cable.

1. Insert mandrel into plunger as shown, lift top gate and insert connector.

2. Close top gate.
3. Close handle completely to compress.
This ensures the connector sleeve is fully compressed onto the cable.
4. Remove the connector assembly from the tool and jumper assembly is completed.
C. FOR RG-7, RG-11 AND 320QR F TYPE CONNECTORS
The following steps demonstrate compressing a PCT-DRS-11L compression connector onto RG11 coaxial cable.
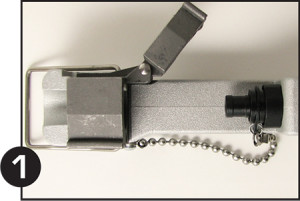
1. Insert mandrel into plunger as shown, lift top gate and insert connector.
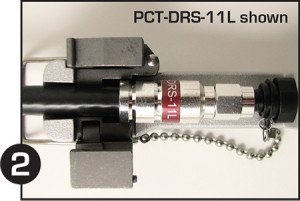
2. Swing the 6/59 gate out to the side of the tool.
3. Open the 7/11 top gate and insert connector and close top gate.
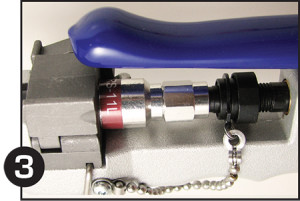
4. Close handle completely to compress.
This ensures the connector sleeve is fully compressed onto the cable.
5. Remove the connector assembly from the tool and jumper assembly is completed.
D. FOR RCA, BNC, IEC AND TRS-RA (Right Angle) CONNECTORS
The following steps demonstrate compressing a PCT-RCA-59 compression connector onto RG6 coaxial cable.
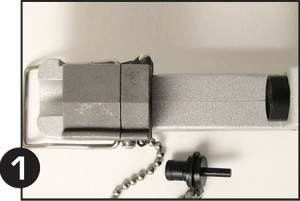
1. Remove mandrel from plunger as shown.
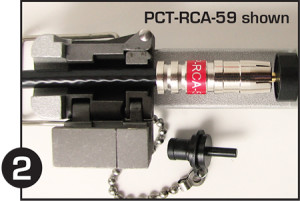
2. Lift top gate, insert connector and close top gate.
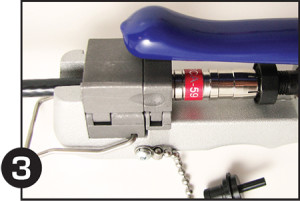
3. Close handle completely to compress.
This ensures the connector sleeve is fully compressed onto the cable.
4. Remove the connector assembly from the tool and jumper assembly is completed.
