PCT-HDTS2 HD PocketView™
HDMI Compact, Portable Display and Tester
Instruction Guide
Products Used in This Guide
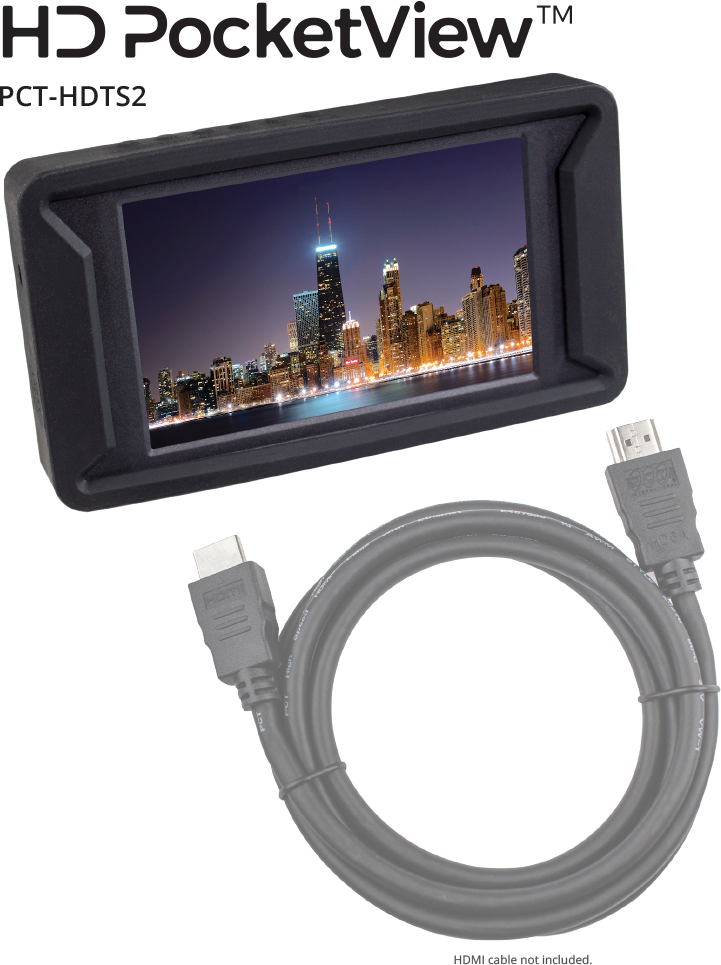
PCT-HDTS2 HD PocketView™
HDMI Compact, Portable Display and Tester
and an HDMI® Cable
(not included with the PCT-HDST2)
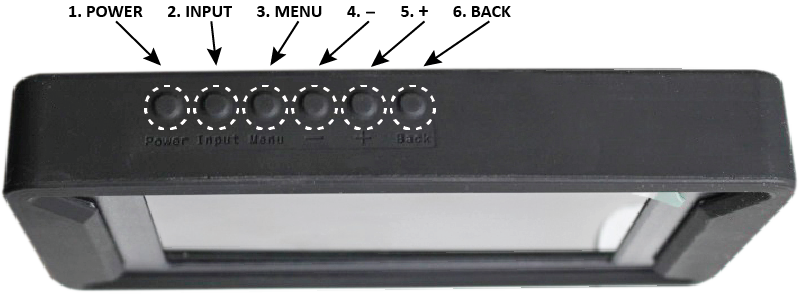
Buttons and Port Layout
- Power: Device ON / OFF, long press for POWER ON
- Input: Reserved for future use (based on upgrade)
- Menu: Allows access to the SETTINGS MENU
- −: Menu navigation DOWN
- +: Menu navigation UP
- Back: Returns to the PREVIOUS MENU
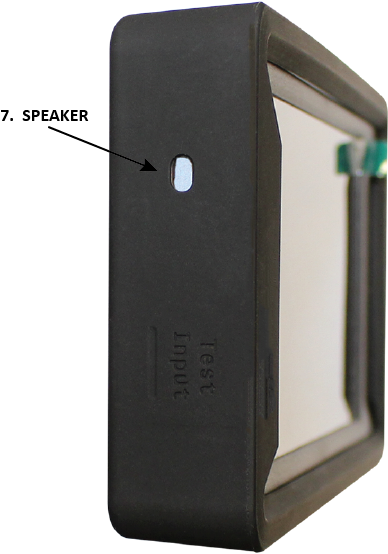
- Speaker: Audio output
- Source Input: Used with HDMI source input for playback
- Charging Port: 5 VDC micro USB port

Getting Started
PLEASE READ ENTIRE CONTENTS OF THE MANUAL BEFORE OPERATION
A. Powering On / Off
- To power on the unit, press and hold the POWER button (1) for 3 seconds until the pop-up menu shown below appears.
B. Menu and Settings Navigation
- To access the device menu, press the MENU button (3).
- To navigate DOWN the menu, use the – (dash) button (4).
- To navigate UP the menu, and use the + (plus) button (5).
- Once in the menu, use the MENU button (3) to select the highlighted option selected.
- To go back in the menu, use the BACK button (6) to go back one step.
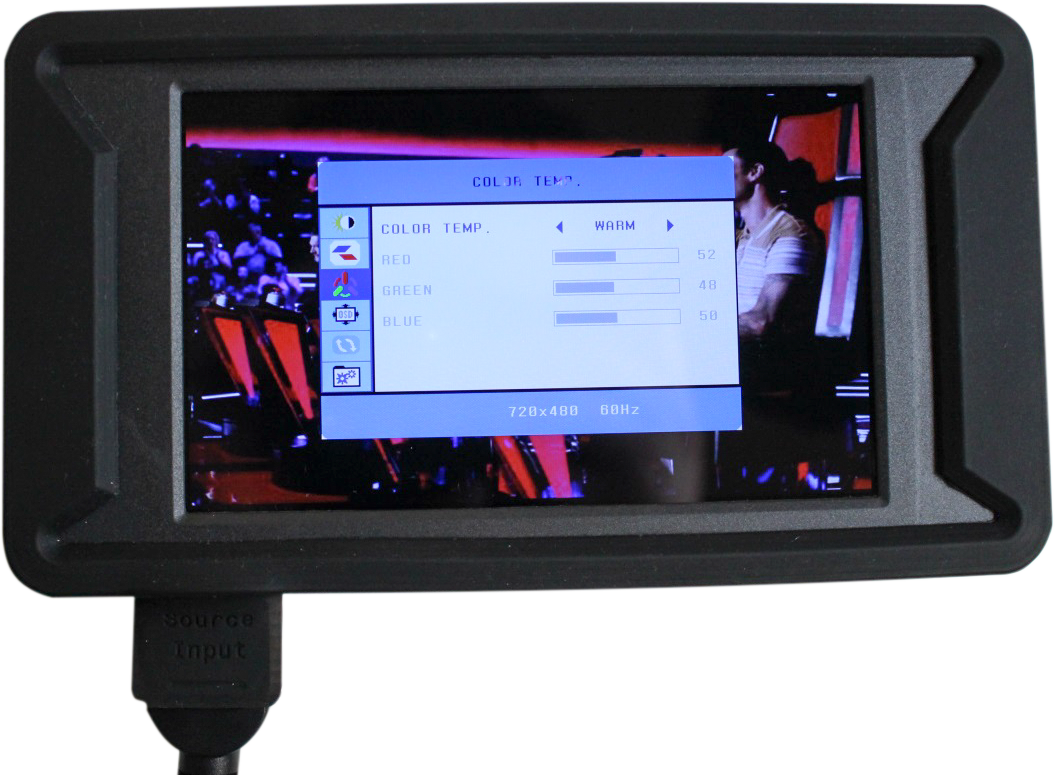
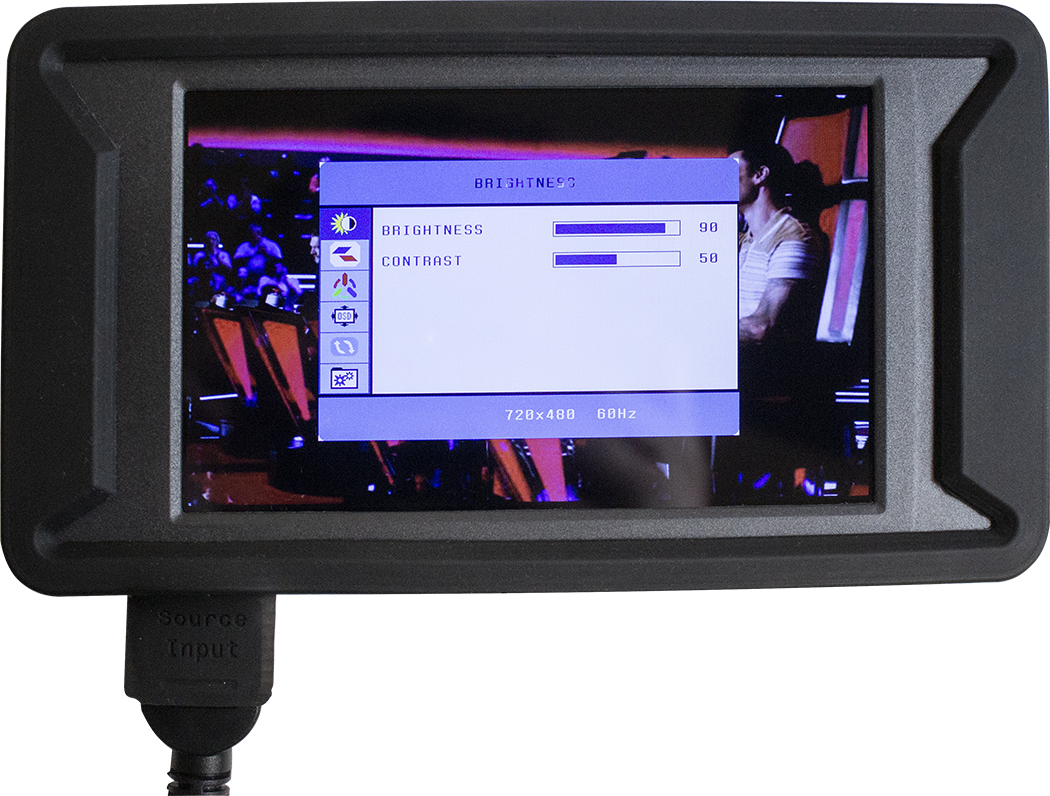
C. Color Menu
The color menu allows for manual adjustments of the display picture. It is recommended to keep the values set to the default values.
- Brightness: Adjusts the display brightness. (Default value is 50.)
- Contrast: Adjusts the display contrast. (Default value is 50.)
- Saturation: Adjusts the color saturation. (Default value is 50.)
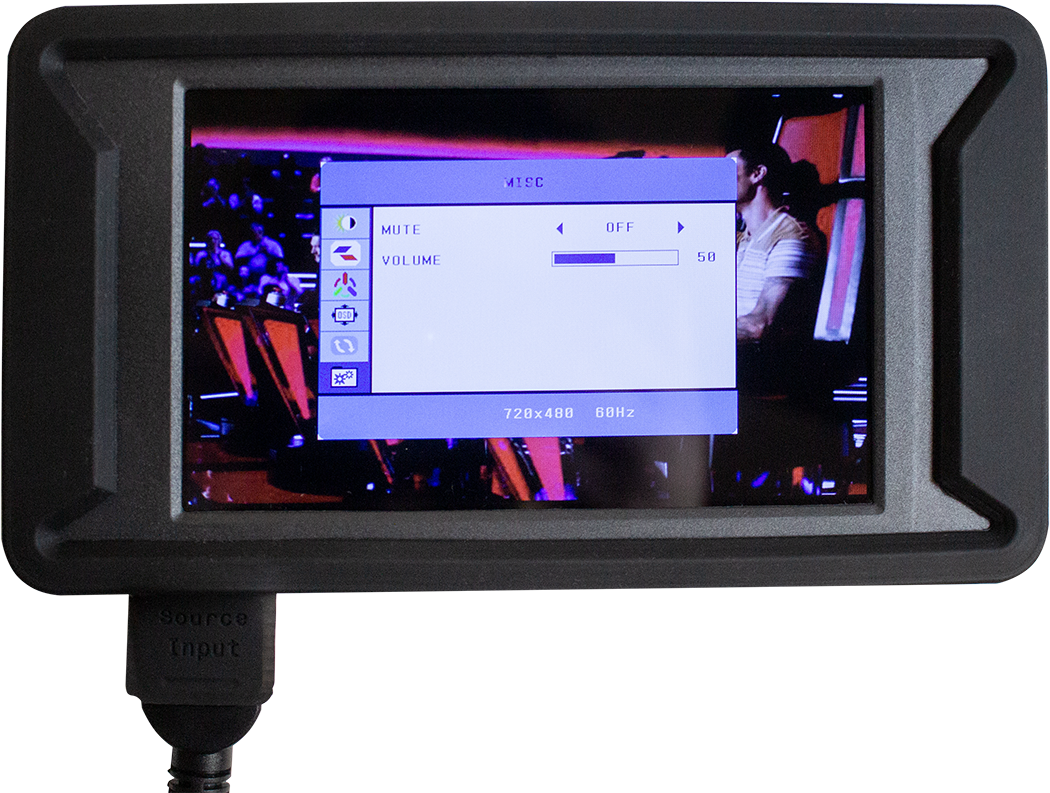
D. OSD Menu
The OSD (On Screen Display) menu allows for manual adjustments of the system language, image positioning and timeout settings. It is recommended to keep the values set to the default values.
- Language: Adjust the system language. (Default value is English.)
- H Position: Adjust the horizontal position of the image. (Default value is 50.)
- V Position: Adjust the vertical position of the image. (Default value is 50.)
- OSD Timeout: Define the time for the OSD to timeout. (Default value is 30 seconds.)
- Transparent: Adjust the transparency of the menu. (Default value is Off.)

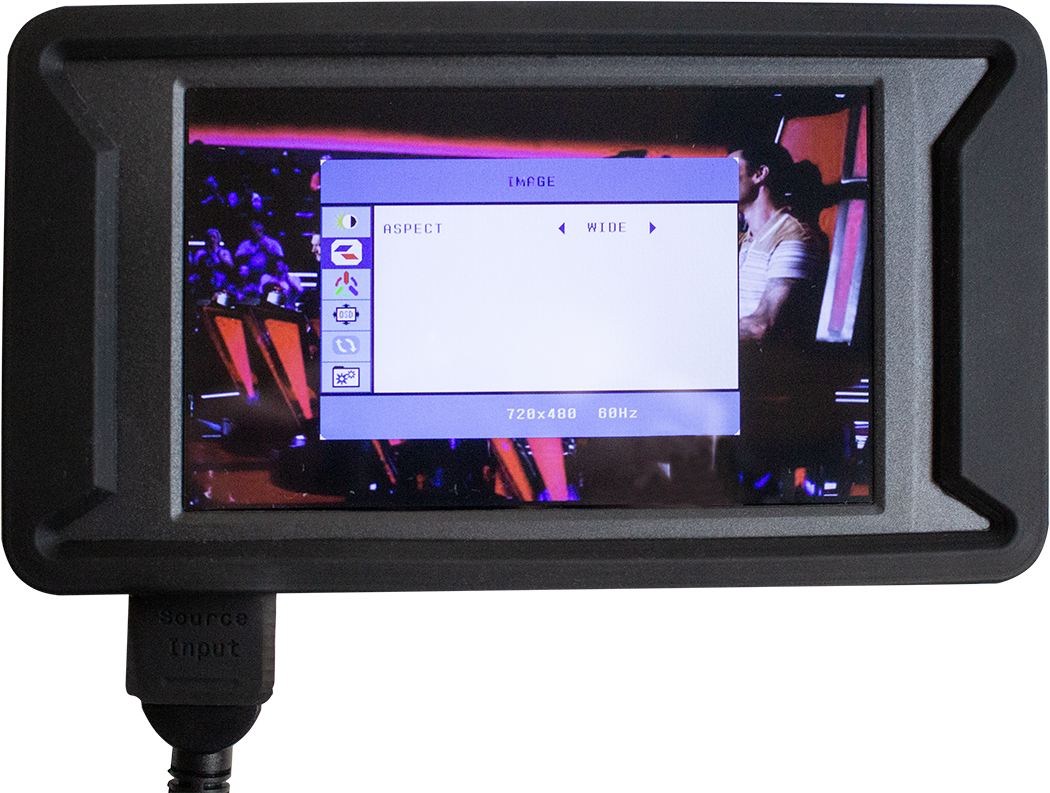
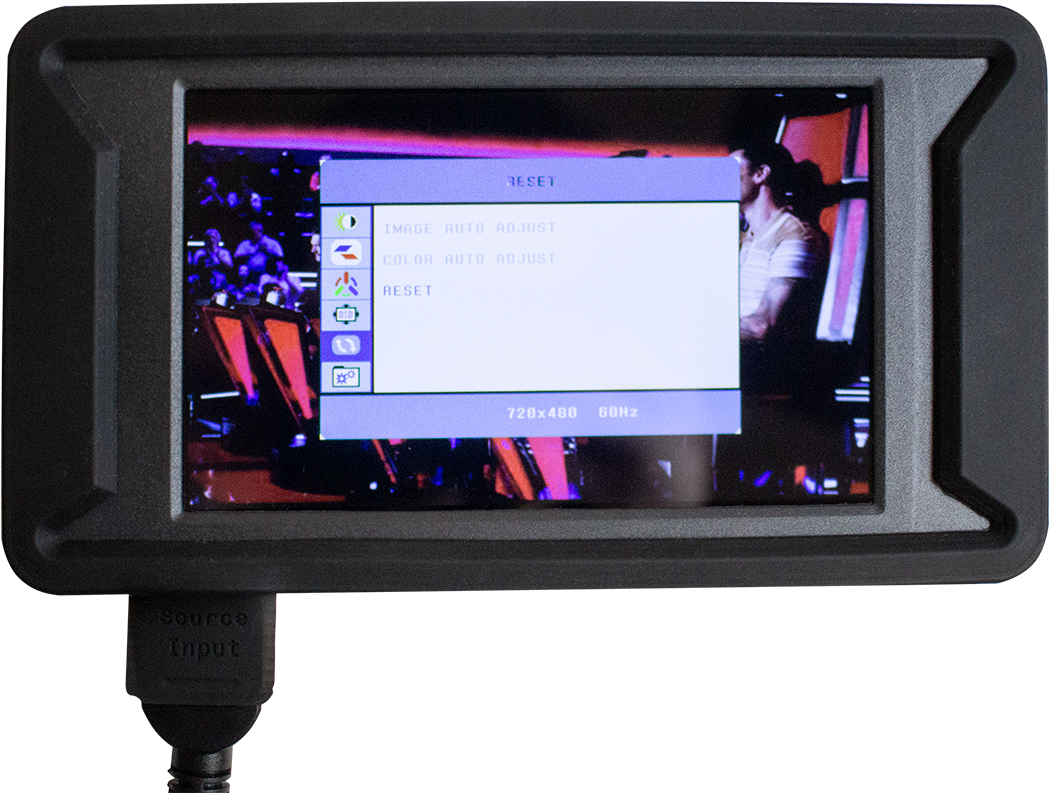
E. Function Menu
The Function Menu allows manual adjustments of the display ratio and various other functions. It is recommended to keep the values set to the default values:
- Reset – Reset system settings to default.
- Display Ratio – Adjust the display ration of the display. (Default value is 16:9.)
- Blue Screen – Adjust the blue screen option. (Default value is On.)
- Sharpness – Adjust the sharpness of the display. (Default value is 50.)
- Display Resolution – Displays the current signal input.
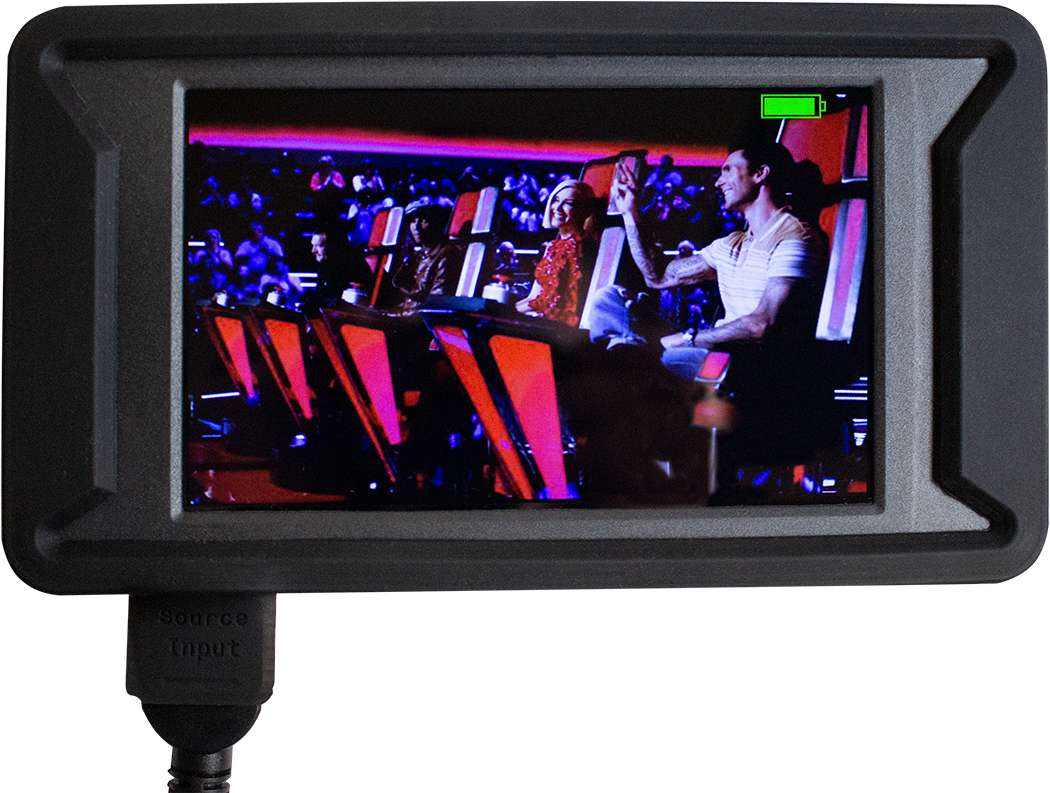
E. Source Playback Testing
Below are examples of various testing results:
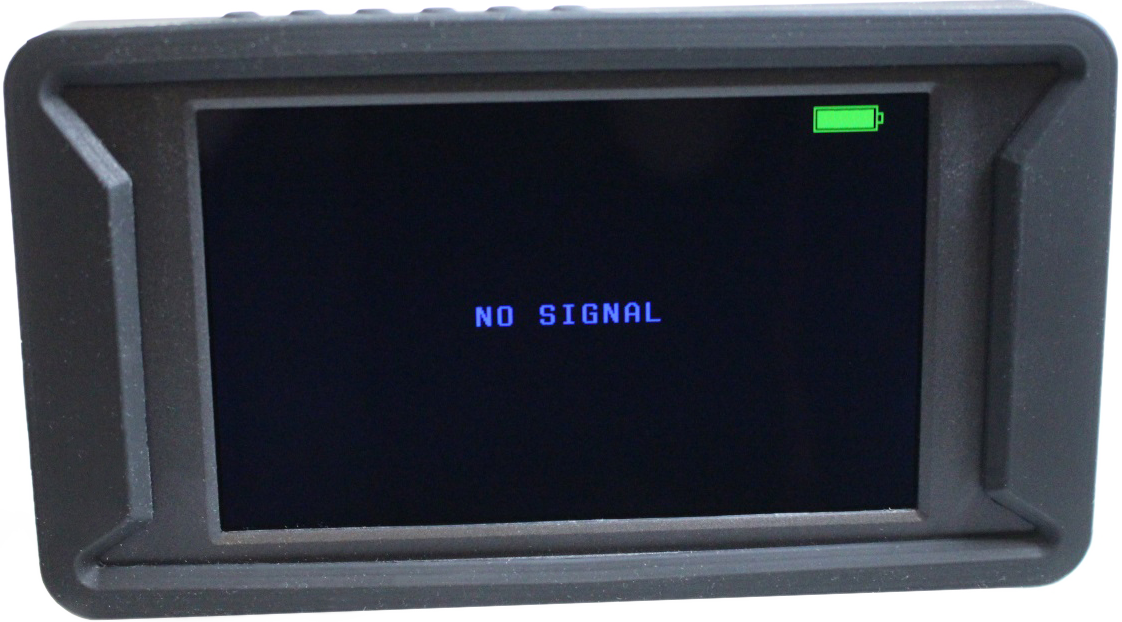
- If there is no cable hooked up to the unit and/or no cable hooked up to the source device there will be a pop up box with the code NO SIGNAL.
- A successful playback test will result in picture and audio playback on the display.
- If the display does not show the source image or play sound then there is an issue with the source device. Check that the source device is powered on, set for playback and set for HDMI video/audio playback
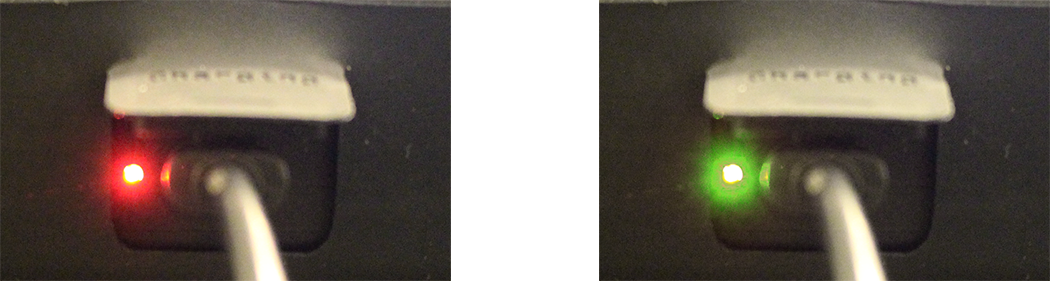
F. Charging the Device
To charge your device, connect the provided 5VDC power supply and Micro USB charger to a 120VAC power source and to the Charging port on the unit. Only use the provided 5VDC power supply and Micro USB cable.
While the unit is charging, the LED light on the left of the charging port will be RED.
When the unit has completed charging, the LED light on the left of the charging port will change to GREEN.
A fully charged battery can provide up to >3 hours of video playback.